

Table of Contents
- What Causes Blisters During Trail Running
- Best Socks for Trail Running: Material and Fit
- Proper Shoe Fit and Lacing Techniques to Prevent Blisters Trail Running
- How to Tape Feet for Running: Step-by-Step
- Anti-Chafing Lubricants, Skin Barriers, and Moisture Management
- How to Treat Running Blisters When They Form
- Foot Hygiene, Callus Care, and Long-Term Blister Prevention
- Conclusion
Last Updated: August 15, 2026
What Causes Blisters During Trail Running
Blisters form through repeated friction against skin. Understanding this mechanical process is the first step to preventing them. At RockResist, the root cause is always the same: friction, moisture, and pressure conspiring against your skin.
Friction, Shearing Forces, and Hot Spots
Friction is surface-level rubbing between skin and sock fabric or shoe seams. More damaging is shearing, where outer skin layers slide laterally against deeper tissue, separating layers and allowing fluid to pool between them.
Hot spots, patches of redness, warmth, or sensitivity, are your early warning signal. On technical terrain, they develop faster because feet shift inside shoes on uneven ground. Descents are especially brutal: feet slide forward with each step, grinding toes against the shoe front. Lateral cuts drive the foot sideways into the upper. Pressure points change constantly, and skin pays the price.
How Moisture and Foot Swelling Make It Worse
Wet skin blisters faster than dry skin. Moisture softens the outer skin layer, reducing its resistance to shearing forces. Stream crossings, rain, and sweat accelerate skin maceration, the breakdown of skin integrity from prolonged dampness. Once macerated, even moderate friction creates blisters.
Feet typically swell during long efforts, sometimes increasing by a full shoe size after several hours on trail. That swelling tightens fit, increases pressure points, and reduces the sock's ability to move friction away from skin. Managing moisture and accounting for swelling are non-negotiable parts of blister prevention.
According to American Academy of Dermatology guidance on skin friction and blister formation, maintaining skin integrity through moisture management is the most effective first line of defense against friction blisters.
Best Socks for Trail Running: Material and Fit
The biggest mistake most runners make is treating socks as an afterthought. The best socks for trail running are your primary defense against blisters, more impactful in many cases than any cream or tape you apply.
Merino Wool vs. Synthetic Fibers
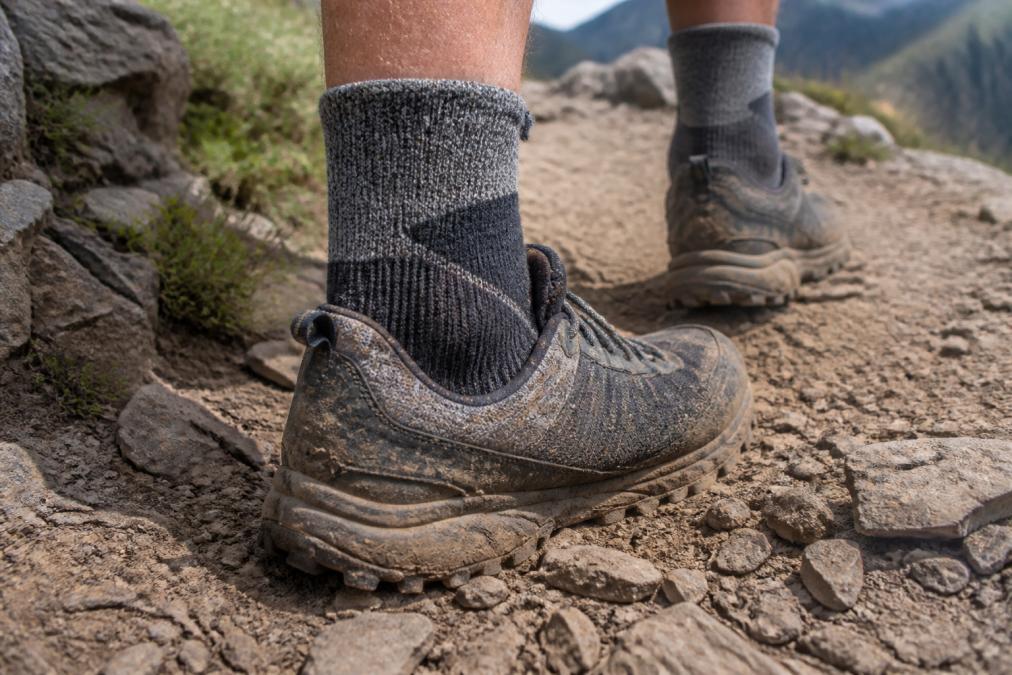
Merino wool manages moisture through absorption, pulling sweat into fibers and releasing it slowly to keep skin drier longer. It regulates temperature effectively on alpine trails and resists odor. Its elasticity conforms to foot anatomy without creating pressure points. The drawback: merino wears faster under high-abrasion conditions like technical rock terrain.
Synthetic fibers, nylon, polyester, or proprietary blends, wick moisture away from skin rather than absorbing it. They dry faster, hold structure longer, and resist abrasion better than merino. High-quality synthetics use compression zones around the arch and heel to prevent sock creases, a significant and underappreciated blister cause.
RockResist socks use moisture-management fibers engineered to keep skin-contact surfaces dry across extended efforts, with reinforced seams that eliminate internal ridges causing hot spots.
Blister Prevention for Wide vs. Narrow Feet
Wide feet create pressure at the pinky toe and outer metatarsal head. Narrow feet tend to slip inside standard-width socks, creating heel slippage and friction at the heel.
For wide feet: prioritize socks with a wider toe box and minimal seam bulk at the lateral forefoot. A sock that compresses the pinky toe creates a friction point that no lubricant fully resolves.
For narrow feet: look for socks with tighter heel compression zones and consider liner socks to take up volume. Heel slippage is one of the most common and most preventable blister causes.
Proper Shoe Fit and Lacing Techniques to Prevent Blisters Trail Running
Shoe fit is where blister prevention begins. Proper fit combined with smart lacing techniques can eliminate the majority of friction issues before they start.
Terrain-Specific Lacing Patterns
Standard lacing works on flat surfaces. On trail, adjust lacing based on terrain demands.
Descents and toe-box protection: Use the "lace lock" or "heel lock" technique, thread the lace through the top eyelet loop to create a cinch point at the ankle. This prevents forward foot slide that drives toes into the shoe front on steep descents.
Wide forefoot, narrow heel: Skip the middle eyelets on the forefoot section and lace tighter through the upper eyelets only. This opens the toe box while locking the heel.
High arches and top-of-foot pressure: Use "window lacing", skip the eyelet directly over the pressure point to relieve compression without loosening overall fit.
| Terrain Challenge | Lacing Technique | Problem It Solves |
|---|---|---|
| Steep descents | Heel lock / lace lock | Toe-box impact and forward slide |
| Wide forefoot | Skip mid-eyelets | Pinky toe and lateral pressure |
| High arch | Window lacing | Dorsal pressure point |
| Technical lateral terrain | Even tension throughout | Lateral heel slippage |
Toe Box Fit and Heel Slippage
The toe box should allow your longest toe roughly a thumb's width of clearance when standing. Fit shoes at the end of the day or after a warm-up run, feet swell, and a perfect morning fit may create pressure points after two hours on trail.
Heel slippage creates friction. If you can slide a finger easily between heel and shoe collar, the fit is too loose. Test with heel lock lacing; if slippage persists, the shoe is likely the wrong last shape for your foot.
How to Tape Feet for Running: Step-by-Step
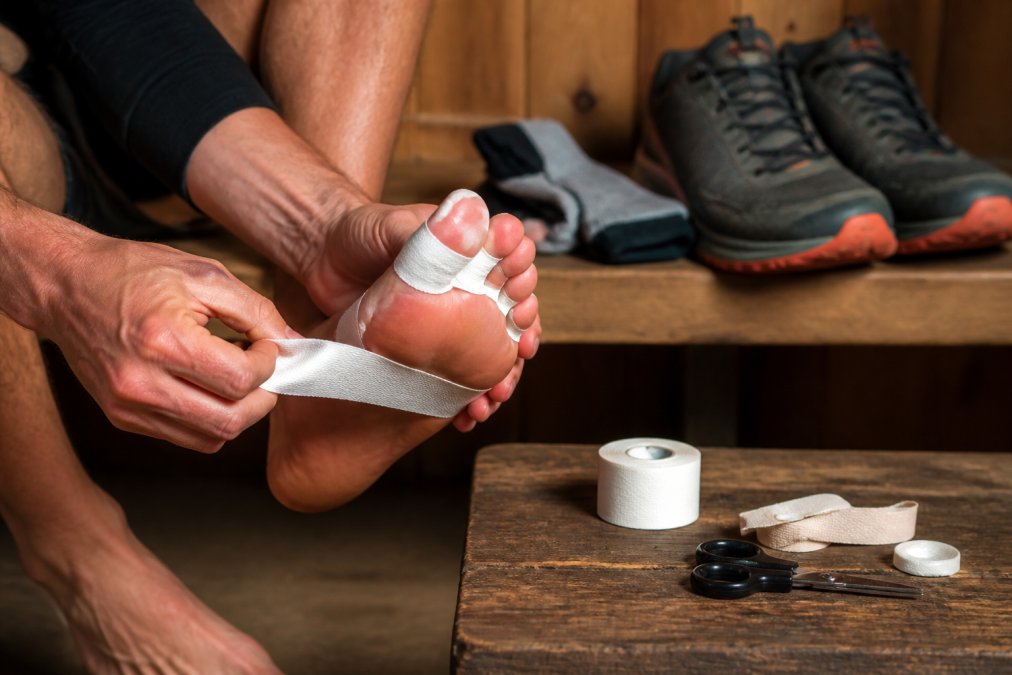
Taping is the most reliable preventative for runners who know exactly where they blister. Proper taping takes about five minutes and can protect a pressure point through an entire ultra-marathon.
What you'll need:
- Athletic tape (1-inch width for toes, 1.5-inch for larger areas)
- Skin barrier spray or tincture of benzoin
- Scissors
- Clean, dry feet
Step 1: Clean and dry the foot completely. Any moisture or oil prevents tape adhesion. Use rubbing alcohol on the target area and allow it to dry fully.
Step 2: Apply a skin barrier. Tincture of benzoin or skin barrier spray creates a tacky surface that improves tape adhesion and protects skin underneath. Allow to dry until slightly tacky, about 60 seconds.
Step 3: Round all tape corners. Square corners peel. Cut every piece of tape with rounded corners before application.
Step 4: Apply without tension. Lay tape flat against skin without stretching. Stretched tape creates pressure points and peels faster.
Step 5: Smooth from center outward. Press from the center toward edges to eliminate air bubbles and ensure full contact.
Toe Taping and Pressure Point Protection
For individual toes: wrap a single layer of 1-inch athletic tape around the toe, overlapping by about a third of the tape width. Two layers maximum, more creates pressure point from tape bulk inside the shoe.
For the ball of foot and heel: use 1.5-inch tape in a single flat layer. On the heel, anchor tape slightly above the heel cup and wrap under to create a friction-absorbing pad. According to sports medicine taping guidelines from the National Athletic Trainers' Association, pre-activity taping of known friction sites reduces blister incidence significantly in endurance athletes.
Anti-Chafing Lubricants, Skin Barriers, and Moisture Management
Anti-chafing lubricant reduces friction by creating a slick barrier between skin surfaces or between skin and fabric. It works best where taping is impractical: between toes, around the heel collar, and at the Achilles.
Choose a product that maintains consistency when wet, some water-based formulas wash away quickly in stream crossings or rain. Apply lubricant to skin, not to the sock. The goal is to reduce friction at the skin surface.
The American Podiatric Medical Association's guidance on athletic foot care recommends keeping feet as dry as possible during exercise as the primary blister prevention strategy. Practical applications for trail runners:
- Change into dry socks at aid stations during events over four hours
- Carry a small zip-lock bag with spare socks for wet conditions
- Use moisture-wicking insoles that draw sweat away from the plantar surface
- Apply foot powder to absorb residual moisture before putting on socks
Breathability in both socks and shoes matters more than most runners realize. A waterproof shoe that traps internal moisture creates worse blister conditions than a non-waterproof shoe that dries quickly.
How to Treat Running Blisters When They Form
Even with perfect prevention, blisters happen. Knowing how to treat them correctly determines whether a small problem stays manageable or sidelines you.
Hydrocolloid Bandages and Field Treatment
Hydrocolloid bandages are the gold standard for blister treatment. They create a moist healing environment, cushion the blister from friction, and can often be left in place for several days.
For intact blisters: do not drain them. The blister roof is the best protection the underlying skin has. Apply a hydrocolloid bandage directly over the blister with at least a centimeter of margin on all sides.
For torn or drained blisters in the field: clean with an antiseptic wipe, leave the blister roof in place if possible, and apply a hydrocolloid bandage. If you must continue running, add a layer of athletic tape over the bandage to prevent peeling.
Post-Run Recovery for Blister-Prone Skin
After every run, wash feet with mild soap, dry thoroughly between toes, and inspect every pressure point. Skin repeatedly stressed without recovery becomes chronically fragile.
Skin conditioning: Apply a foot balm or cream containing urea or lanolin to keep skin supple. Supple skin resists shearing better than chronically dry skin.
Callus management: Calluses provide natural blister protection, but overgrown calluses develop hard edges that create friction points. File calluses with a pumice stone after showering when skin is soft. The goal is even, moderate thickness, not removal.
Foot Hygiene, Callus Care, and Long-Term Blister Prevention
Long-term blister prevention requires treating foot hygiene as part of your training protocol. Runners who build a consistent routine see dramatic reduction in blister frequency over a season.
Daily habits that compound over time:
- Wash and dry feet thoroughly after every run, including between toes
- Rotate between at least two pairs of quality trail socks to allow full drying
- Inspect shoes regularly for worn insoles, degraded heel counters, or internal seam separation
- Trim toenails straight across, keeping them short enough that they don't contact the shoe upper on descents
Callus care in practice: Healthy callus formation is a training adaptation. Skin exposed to repeated friction gradually thickens and toughens. The goal is to keep that protective layer even and smooth, not to eliminate it.
Foot anatomy and long-term adaptation: Over a full training season, feet adapt to specific terrain and shoe demands. Hot spots that produce blisters in early weeks often resolve as skin toughens. This is why blister prevention requires patience, the right sock and shoe combination needs time to produce adaptation.
The RockResist debris-shielding cuff design addresses one long-term issue that other socks ignore: trail debris that enters the sock and creates friction points mid-run. Small particles of grit against skin over several hours produce blisters as reliably as any seam or fit issue.
For runners building toward an ultra-marathon or multi-day event, consider a structured foot conditioning protocol in the 8-12 weeks before the event. Gradually increase run duration, monitor hot spot development, and address each one systematically with the taping, sock, and lacing adjustments described above.
Blister prevention requires a systematic approach, not a single product fix. The runners who stay blister-free across long distances treat foot care as a technical skill, one they build and refine over every training block. RockResist socks are engineered specifically for this challenge, with moisture-management fibers, reinforced seams, and debris-shielding cuff technology that address the root causes of trail blisters rather than just masking symptoms. Add to cart and put them to work on your next long run.
Frequently Asked Questions
How do runners avoid blisters on long trail runs?
Avoiding blisters on long trail runs comes down to controlling friction and moisture. Wear moisture-wicking socks with no internal seams, dial in your shoe fit so there is no heel slippage, and apply an anti-chafing lubricant to known hot spots before you start. For runs over 10 miles, pre-tape pressure points with athletic tape or a hydrocolloid bandage. Stopping to address a hot spot the moment you feel it prevents most blisters from forming at all.
What are the best socks for preventing blisters during trail running?
The best socks for trail running combine moisture-wicking fibers, a snug compression zone around the arch, and a seamless toe box. Merino wool regulates temperature and resists odor, while synthetic blends dry faster on wet terrain. Double-layer liner socks add a second friction surface so shearing forces act between the layers rather than against your skin. Avoid cotton entirely, it holds dampness against the skin and dramatically increases the risk of skin maceration and blister formation.
Should I pop a blister from running?
Generally, leave intact blisters alone, the fluid inside acts as a natural cushion and protects against infection. If a blister is large, painful, or in a spot that makes walking impossible, you can drain it by sterilizing a needle with alcohol, puncturing the edge, and pressing the fluid out while keeping the skin flap intact. Cover it immediately with a hydrocolloid bandage. Never tear off the roof of the blister, as that skin is your best protection while the area heals.
Can I keep running if I have blisters?
Small, intact blisters covered with a hydrocolloid bandage can often be managed through a run, especially in a race situation. Clean the area, apply a blister-specific bandage, add a layer of athletic tape over it for extra protection, and monitor it closely. Avoid running on an open or infected blister, broken skin on trail terrain carries a real infection risk. After the run, clean the blister, redress it, and give the skin time to rebuild before your next hard effort.
This article was written using GrandRanker