

Table of Contents
- Why Rugged Terrain Causes Debris and Blisters
- How to Prevent Blisters on Long Runs
- Trail Running Gaiters for Debris: Do They Work?
- Best Socks for Trail Running on Rugged Terrain
- How to Treat a Running Blister on the Trail
- Downhill Movement, Footwear Fit, and Debris Control
- Conclusion: Build a System That Works on Rugged Terrain
- Frequently Asked Questions
Last Updated: October 6, 2026
Why Rugged Terrain Causes Debris and Blisters
Rugged terrain attacks feet through three channels at once: grit that works its way in, friction that grinds skin, and moisture that softens skin until it tears.
Every step on loose rock or gravel kicks fine particles toward the shoe collar. Once inside, they sit between skin and sock like sandpaper. Add sweat and heat from a stiff climb, and skin breaks down fast.
How Friction, Heat, and Moisture Work Together
Blisters rarely come from one factor alone. They come from friction, heat, and moisture compounding.
Moisture is the multiplier: sweat softens the outer layer of skin, so far less rubbing separates the layers beneath. Heat speeds sweat production and keeps skin warm and pliable.
The practical takeaway: solve moisture and debris, and friction loses most of its bite. Neglect either one and no sock or shoe will save you.
How to Prevent Blisters on Long Runs
Preventing blisters on long runs comes down to preparation before the run and discipline during it. Runners who finish 20 miles without a hot spot simply control moisture, fit, and debris before the first mile.
Start with these steps:
- Trim toenails straight across and file any sharp edges.
- Apply a zinc-based cream or a thin layer of petroleum jelly to known problem areas.
- Choose moisture-wicking socks, never cotton.
- Lace shoes so the heel stays locked without cutting off circulation.
- Re-tie and clear debris at the first sign of grit, not at mile 15.
Foot Prep and Skin Care Before You Start
Skin preparation is the cheapest blister insurance you can buy. A thin barrier of zinc-based cream or tape over problem areas reduces friction directly.
For multi-hour efforts, tape the heel and toe tops before you leave; a low-friction surface between skin and sock does more than any single piece of gear. Keep a small foot-care kit in your pack: tape, dressings, and spare socks.
Trail Running Gaiters for Debris: Do They Work?
Trail running gaiters for debris work, but only when they seal the gap where debris actually enters. A gaiter that covers the ankle but leaves the shoe collar open is decoration.

The principle is simple: block the entry point. Most grit enters at the collar, the space between shoe top and sock top.
Where gaiters fall short is loose, deep terrain where particles work in from above the collar line.
Best Socks for Trail Running on Rugged Terrain
The best socks for trail running on rugged terrain combine moisture-wicking fibers, a secure non-slip fit, and a collar barrier that keeps grit out. Fit matters as much as material: a sock that slides creates its own friction.
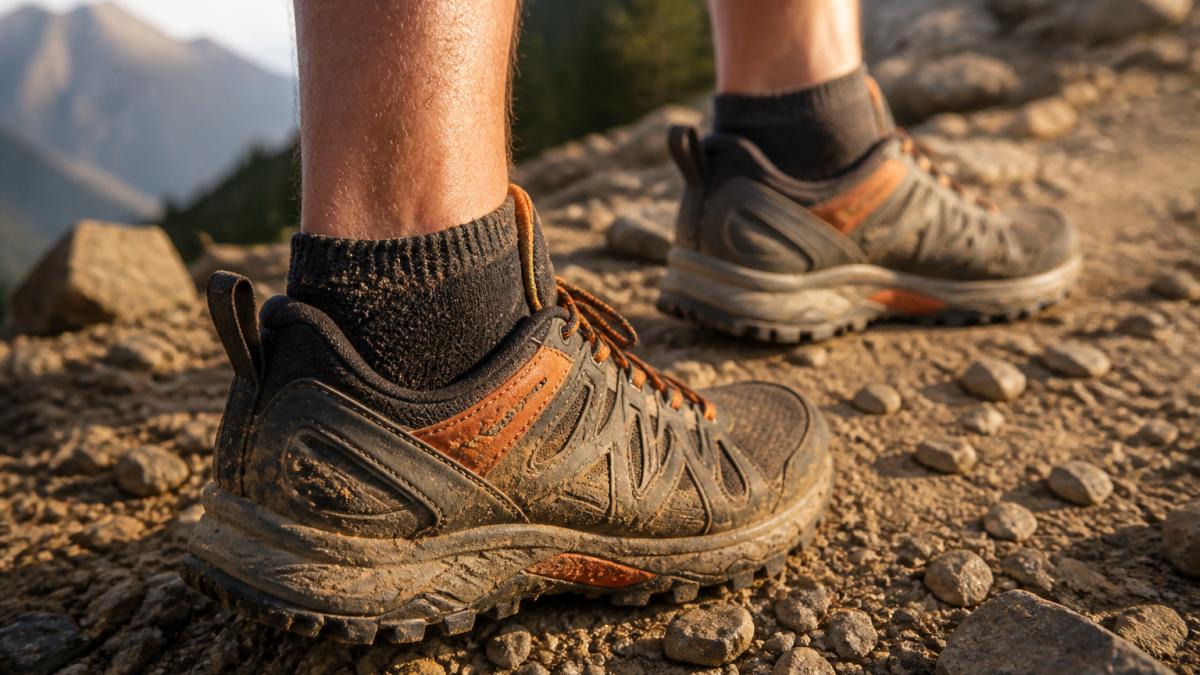
The American Podiatric Medical Association guidance on foot health consistently points to moisture management and proper fit as the foundations of blister prevention, and our experience on Colorado trails backs that up.
Material Choices: Wool Blends vs. Cotton vs. Synthetics
Wool blends and synthetics move moisture away from skin. Cotton holds it against you.
| Material | Moisture Handling | Friction When Wet | Best For |
|---|---|---|---|
| Wool blend | Wicks and holds warmth | Low | Cold, wet, long efforts |
| Synthetic | Wicks fast, dries fast | Low | Hot weather, high sweat |
| Cotton | Absorbs and stays wet | High | Everyday wear, not trails |
The RockResist GEN1 Trail Running Socks use a 75% cotton and 25% terylene blend with added heel material to reduce friction at the collar, plus an integrated barrier that blocks dirt, sand, and small trail debris at the shoe collar. At $25.99 a pair, or $58.48 for a three-pair bundle, it is a straightforward way to test the system.

How to Treat a Running Blister on the Trail
Treating a running blister on the trail starts with stopping the moment you feel a hot spot, not when the blister has formed.
What most guides skip is the decision logic: which blisters you can keep running on, which to cover and walk out, and which end your day. Here is a stop-check-treat-resume protocol you can run anywhere on the trail.
Stop-Check-Treat-Resume Protocol
Stop. At the first hot spot, pull over at the next safe spot. Do not wait for an aid station; two minutes now saves twenty later.
Check. Remove shoe and sock. Look at three things: color (red but intact vs. raised fluid), location (heel, toe, forefoot, arch), and cause (grit, seam, lace pressure, heel slip).
Treat. Match the intervention to what you found:
| Finding | Location | Likely Cause | Field Fix |
|---|---|---|---|
| Red, intact hot spot | Heel | Heel slip on descents | Low-friction tape or patch, re-lace with heel lock |
| Red, intact hot spot | Toe tops | Toe box too short, downhill jam | Tape toe tops, tighten midfoot lacing |
| Red, intact hot spot | Forefoot/ball | Debris under sock, seam rub | Shake out grit, change sock, patch |
| Raised blister, intact | Any | Friction plus moisture | Cushion with a donut-style dressing, do not drain |
| Torn or open blister | Any | Continued friction on a formed blister | Cover with a sterile non-adherent dressing, then tape |
Resume. Re-lace, walk 20 steps, then jog 50. If the hot spot returns within a quarter mile, stop again. The fix did not address the cause.
RockResist GEN1 Trail Running Socks, Debris-Blocking Low Cut →
Draining, Covering, or Leaving It Alone
Most practitioners find intact blisters heal faster and with lower infection risk than drained ones, and that draining in the field with unsterilized tools is the most common way a manageable blister becomes a race-ending infection. The practical rules:
- Intact blister, you can still run: cushion it, do not drain it. A donut-style dressing or a blister patch that lifts pressure off the roof of the blister is the standard field approach.
- Intact blister, you cannot run: cushion it and walk out. Draining at home with a sterile needle, if you choose to, is a different risk calculation than draining on a dusty trail.
- Torn or open blister: treat it as a wound. Clean with water, cover with a sterile non-adherent dressing, then secure with tape. Do not apply a zinc-based cream or petroleum jelly to an open blister; those are for intact skin.
What Goes in a Trail-Side Foot Kit
A small kit weighs almost nothing and covers every scenario above:
- Low-friction tape (a few strips pre-cut to heel and toe length)
- Two blister patches or donut dressings
- One sterile non-adherent dressing for an open blister
Keep it in the same pocket every run so you do not have to think about where it is when you need it.
Downhill Movement, Footwear Fit, and Debris Control
Downhill running is where most blisters are born. Your foot slides forward into the toe box on every braking step, grinding skin against sock and sock against shoe. Here is the downhill-specific playbook.
Why Descents Cause More Blisters Than Climbs
On a climb, your foot presses back into the heel counter and stays relatively still. On a descent, three things happen at once:
- Forward slide. Braking steps push your foot toward the front of the shoe, loading the toe tops and the front of the heel.
- Higher shear per step. The same friction force concentrated over a shorter, faster step cycle does more damage per mile than a slow climb.
- More debris entry. The shoe collar opens and closes with each braking step, pumping grit in through the gap between shoe and sock.
That is why a runner who is fine for ten uphill miles can develop a hot spot in two downhill ones.
Lacing for Descents: The Heel-Lock
The single highest-value fix is a heel-lock lacing pattern. Run laces normally to the second-to-last eyelet, then cross the laces and thread each end back through the top eyelet on the same side, creating a loop.
Pair the heel lock with a midfoot cinch: snug laces across the middle of your foot so it cannot slide forward, while leaving the toe box roomy.
Fit Faults That Cause the Most Damage
- Heel slippage. More than a few millimeters of lift on a steep descent means the heel lock is not working or the shoe is too long.
- Excess toe room. Roughly a thumb's width between your longest toe and the front of the shoe is the target. More than that and your foot builds momentum before it hits the front.
- Too-narrow toe box. If your toes touch the sides, downhill jamming will bruise toenails and rub the little toes raw.
Debris Control on Descents
Debris control and fit are connected. A loose shoe lets grit in and lets your foot move. A secure shoe with a debris-blocking cuff reduces both problems at once.
The entry point is almost always the collar, the gap between the top of the shoe and the top of the sock. Two layers close it:
- A debris-shielding cuff built into the sock, which sits at the entry point and moves with your foot rather than floating above it.
- A trail gaiter over the collar, which adds a second seal for loose, deep terrain where particles work in from above.
For runners who want both, a gaiter over a cuff-style sock is a strong combination. If you are coming from a standard crew sock, expect the cuff to feel different for the first mile, then forget you are wearing it.
Test the System Before Race Day
Do not debut a new shoe, sock, lacing pattern, or tape job on race day. A progressive test plan catches problems while they are cheap to fix:
- Short easy run (3-5 miles). Confirm the heel lock holds and the cuff does not rub.
- Hill repeat session. Descend hard on purpose. This is where heel slip and toe jam show up.
- Long run at race effort (12-20 miles). Confirm the system holds when you are tired and your form degrades.
- Wet run. Moisture changes everything. Test in the conditions you expect.
If a hot spot appears at any stage, change one variable at a time, lacing first, then sock, then shoe, so you know what actually fixed it.
Conclusion: Build a System That Works on Rugged Terrain
Blisters on rugged terrain are a systems problem needing a systems answer: dry skin, locked-in fit, wicking socks, and a barrier at the collar where grit gets in.
RockResist builds gear for exactly this. Our GEN1 Trail Running Socks pair a debris-shielding cuff with moisture-management fibers and reinforced heel material, tested on Colorado trails and trusted by athletes who race on technical ground.
Add to cart.
Frequently Asked Questions
How to stop getting blisters on long runs?
Prevention starts before you leave. Apply a zinc-based cream or tape to known problem areas, choose moisture-wicking socks that fit snugly without bunching, and keep debris out with a barrier at the shoe collar. On the trail, stop at the first hot spot. A five-minute break to dry the foot and add a protective covering prevents a hot spot from becoming a full blister. Testing your footwear and sock system on shorter runs before race day matters just as much as the gear itself.
Do trail running gaiters help prevent blisters?
Gaiters help by blocking dirt, sand, and small rocks from entering at the shoe collar. That debris causes friction and skin irritation, which leads to hot spots and blisters. Gaiters work best when paired with moisture-wicking socks and a secure shoe fit. They are not a standalone fix. If your socks hold sweat or your heel slips on downhills, gaiters alone will not stop blisters. Use them as one part of a complete prevention system for rugged terrain.
Is it better to cover a blister or let it air out?
Cover it during activity. A blister patch or low-friction dressing protects the skin from further friction and keeps dirt out. Airing out helps only during rest, when you can remove footwear and let the foot dry. On the trail, cover the blister with a dressing, then secure it with tape if needed. If the blister has opened, clean it with water, apply an antibiotic ointment, and cover it before continuing. Seek medical care if you see signs of infection.
What should you do if a blister develops during a trail run?
Stop at the first sign of a hot spot. Remove your shoe and sock, dry the area, and apply a blister patch or tape. If a blister has already formed, do not pop it. Cover it with a protective dressing and adjust your lacing to reduce movement. For the remainder of the run, check the area at aid stations. After the run, clean the foot, apply ointment, and let it air out overnight. Persistent or infected blisters need medical attention.
How should trail running shoes fit to reduce blisters?
Your shoe should lock the midfoot and heel without squeezing the toes. Leave about a thumb's width between your longest toe and the front of the shoe. On downhills, a loose heel causes slippage and friction. A tight toe box causes toe movement and rubbing. Adjust lacing to secure the heel while keeping the forefoot comfortable. Test the fit on downhill sections before a long run or race. Proper fit reduces heel slippage and toe movement, two common blister causes.
Do two pairs of socks prevent blisters?
Two pairs can reduce friction because the layers slide against each other instead of against your skin. That said, two pairs also add heat and moisture, which can make things worse if the socks do not wick sweat. A single pair of moisture-wicking socks with a secure fit and a debris barrier often works better. If you try two pairs, use thin liner socks under a thicker outer sock and test the combo on a long training run before race day.