
Last Updated: November 18, 2026
Quick Summary
To tell if hiking boots fit correctly, check four things: enough room at the toes, a snug heel, a secure midfoot, and no hot spots after walking. Test them with your hiking socks, later in the day, using a five-stage home walk test.
- Keep about a thumb's width between your longest toe and the front of the boot.
- Your heel should stay seated when you walk uphill and not slip with every step.
- Test boots late in the afternoon, when feet are typically at their largest.
- Wear the same socks you plan to hike in, since thin dress socks can mislead you.
- If the heel slips, try a lacing change before sizing down.
Table of Contents
- How Hiking Boots Should Fit Overall
- How to Tell If Hiking Boots Fit Correctly at Home
- How to Know If Hiking Boots Are Too Big
- How Socks Change the Way Your Boots Fit
- Should Hiking Shoes Be a Size Bigger?
- Testing Boots at the End of the Day When Feet Are Swollen
- How to Break In Hiking Boots Without Losing Your Fit
- Frequently Asked Questions
How Hiking Boots Should Fit Overall
Knowing how to tell if hiking boots fit correctly comes down to four things: enough room at the toes, a snug heel, a secure midfoot, and no hot spots after a walk. A boot that feels fine in the store can still cause discomfort on a long trail, so the test has to involve walking, not just standing.
Start with the basics. Your toes should have room to move, your heel should stay in place when you walk uphill, and the sides of your foot should not feel squeezed (Footwear advice). Pressure in any one spot is a warning sign, even if the rest of the boot feels comfortable.
Because boots and feet change over a day, try them on later in the afternoon, when feet are slightly larger. Wear the socks you plan to hike in. Thin dress socks can make a boot feel roomy in the store and tight on the trail.
How to Tell If Hiking Boots Fit Correctly at Home
A home test is the fastest way to check fit before you commit to a long hike, but it only works if you run the same sequence every time and know what a pass or fail looks like.
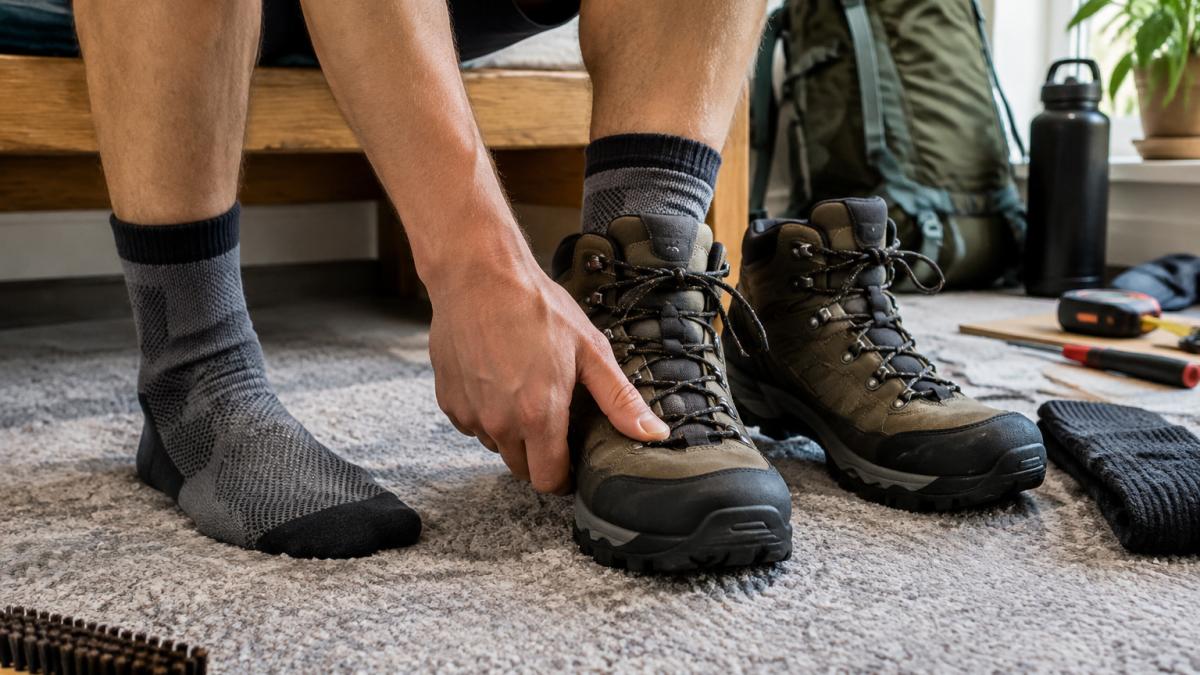
Stage 1: Static stand. Put on the socks you plan to hike in and lace the boots the way you normally would. Stand up and press your toes forward until they touch the front.
Stage 2: Flat walk. Walk around the room for five minutes, including a few turns and a short stair flight if you have one. Pass: no hot spots, no side-to-side sliding, no pressure on the top of the foot. Fail: any rubbing, pinching, or numbness within the first few minutes, which usually gets worse with more walking.
Stage 3: Uphill check. Walk up a ramp or a stair step and lean forward slightly. Pass: your heel stays seated and your toes do not slide forward into the front.
Stage 4: Downhill check. Walk down the same ramp or step slowly. Pass: your longest toe does not contact the front of the boot.
Stage 5: Side pressure check. Press your fingers along the sides and top of the boot while standing. Pass: even pressure with no sharp points.
Watch out: testing in thin dress socks can make a boot feel roomy in the store and tight on the trail, so always test with your hiking socks. Since the socks you wear affect how much room a boot needs, consider hiking sock thickness when deciding whether a snug fit calls for a wider model.
Toe Box Room and the Longest Toe
Your toe box is the front part of the boot where your toes sit. Find your longest toe, which is not always your big toe. With the boot laced and your heel pushed back, you should have roughly a thumb's width between that toe and the front of the boot.
If your toes touch the front when you walk downhill, the boot is too short. Toes that rub the front or sides often lead to black toenails and blisters on long descents.
Heel Hold and Heel Lift
Your heel should stay firmly in the back of the boot. Some heel movement is normal when a boot is new, but a heel that slips up and down with every step will cause rubbing.
To test heel hold, lace the boot snugly to the top and walk uphill if possible. If the heel lifts more than slightly, try tightening the top eyelets. If the slipping continues, the boot may be too big or the wrong shape for your heel.
The five-stage home test runs in order, and each stage has a clear pass or fail result.
| Stage | What to do | Pass / Fail |
|---|---|---|
| Static stand | Press toes forward; feel about a thumb's width behind the heel | Pass: heel stays back, toes have room. Fail: toes jam or heel lifts |
| Flat walk | Walk five minutes, including turns and stairs | Pass: no hot spots or sliding. Fail: rubbing or numbness |
| Uphill check | Walk up a ramp or step, leaning forward slightly | Pass: heel stays seated. Fail: heel lifts or foot slides forward |
| Downhill check | Walk down the same ramp or step slowly | Pass: longest toe clears the front. Fail: toe contact |
| Side pressure check | Press fingers along sides and top while standing | Pass: even pressure. Fail: a single tight spot |
How to Know If Hiking Boots Are Too Big
Boots that are too big cause their own problems, and the symptoms overlap with boots that are the wrong shape. Use this symptom-to-cause map to tell the difference before you size down.
- Heel slipping out of the back on every step. Likely cause: too much volume in the heel or a boot that is a half size too long. Try a heel-lock lacing pattern first, then a thicker sock, then a smaller size.
- Toes hitting the front on downhills. Likely cause: the foot slides forward because the midfoot is loose, not always because the boot is too short. Tighten the midfoot lacing and retest the downhill before exchanging.
- Feeling unstable on uneven ground. Likely cause: the boot is too wide or too long, so the foot moves inside it. Check by pressing the sides while standing; if the foot slides sideways, the boot is the wrong width.
- Needing to lace very tightly just to keep the foot in place. Likely cause: too much volume overall. A volume reducer or a thicker sock can help, but if the boot still feels loose, it is the wrong size or last for your foot.
- Numbness or tingling on top of the foot. Likely cause: lacing too tight over a high instep, not a size problem. Loosen the midfoot lacing and retest before changing sizes.
A common pattern is that hikers size up to fix toe pressure and then create heel slip, or size down to fix heel slip and then create toe pressure. The fix is usually a lacing change or a different boot shape, not a different size. Before you size down, check whether a different sock thickness or a lacing change fixes the problem.
Watch out: if you have a wide forefoot and a narrow heel, no single size will fix both ends, and you should look for a boot with a narrower heel and a roomier toe box rather than sizing up or down.
How Socks Change the Way Your Boots Fit
Your socks change the fit more than most hikers expect. A thick wool sock can make a snug boot feel tight, while a thin liner can make the same boot feel loose. Test your boots with the exact socks you plan to wear on the trail.
A quick checklist for socks:
- Wear the same thickness you will hike in
- Avoid bunching or folded seams at the toes and heel
- Check that the cuff does not dig into your shin or ankle
- Replace socks that have stretched out, since loose socks let your foot slide
Hiking socks that are built for debris control can also change how a boot feels around the collar. RockResist GEN1 low-cut socks, made from 75% cotton and 25% terylene, have an integrated barrier that helps block dirt, sand, and small trail debris at the shoe collar. You can wear the barrier up for loose terrain or tuck it in for a lower-profile look. Test the sock and boot together, because the barrier adds a little bulk at the top of the boot. View RockResist Socks & Sizing at https://rockresist.com/products/rockresist-socks to check current sizing.
Should Hiking Shoes Be a Size Bigger?
Many hikers size up for swelling and long descents, but a full size bigger is not always right. Going up half a size is often enough to give your toes room without creating heel slip.
Consider sizing up if your feet swell a lot on long hikes or if your toes always hit the front. Stay at your normal size if your heel fits well and your toes have room. For more on picking the right size for rugged trails, see How To Choose Trail Running Shoe Size.
Testing Boots at the End of the Day When Feet Are Swollen
Feet grow during the day, so a boot that fits in the morning can feel tight by evening. To test for this, try boots on in the late afternoon, after you have been on your feet for a few hours.
Walk for at least ten minutes, including some stairs or an incline. If the boots pinch or create hot spots only at the end of the day, look for a wider or roomier model. Many hikers test boots late in the day because that is when feet are typically at their largest.
How to Break In Hiking Boots Without Losing Your Fit
A good break-in should loosen stiffness, not change the fit. Wear the boots on short walks first, then build up to longer hikes over a few weeks. Stop if you feel new pressure points, because the fit may be wrong rather than just stiff.
Tips for a smoother break-in:
- Start with two or three walks of 30 to 60 minutes
- Wear your hiking socks every time
- Check for red spots or rubbing after each walk
- Use blister tape on any spot that starts to rub
Hikers who want to fit boots and socks together can also read Merino Wool Vs Synthetic Socks For Hiking and How to Stop Socks From Slipping Inside Shoes to keep the foot steady inside the boot.
Frequently Asked Questions
How do you know if hiking boots are a good fit?
A well-fitting hiking boot has about a thumb's width of space past your longest toe, a heel that stays put when you walk downhill, and a snug midfoot without pinching. Lace the boot, stand, then walk up and down a slight incline indoors or on a ramp. Your toes should not jam into the front on descents, and your heel should not lift more than slightly with each step. If you feel hot spots or pressure within the first few minutes, the fit likely needs adjusting or a different width. Test with the socks you plan to hike in, since sock thickness changes the fit.
Should hiking shoes be a size bigger than my normal shoe size?
Many hikers need a half size larger in hiking boots than in dress or casual shoes, because feet tend to swell during long days and boot construction differs from everyday footwear. That said, you should not size up so far that your heel lifts or your foot slides forward. Measure your foot length and width, compare against the manufacturer's sizing guide, and test the boot with your hiking socks on. The right size gives room at the toe without the heel slipping.
Is it normal for hiking boots to hurt at first?
Some break-in discomfort is normal, especially on stiff leather boots, but pain that concentrates on one spot, pinching, or numbness is a sign of poor fit rather than break-in. Mild pressure that eases within a few short walks is usually fine. If you still get hot spots or blisters after several wearings, check heel slip, toe contact and width, and consider a different size or width rather than forcing the boot to stretch.
How much room should be at the toe of a hiking boot?
Aim for enough space that your longest toe does not touch the front of the boot when you stand, and so you can wiggle your toes freely. On descents, your toes should stop short of the toe box rather than jamming into it. Many hikers find a thumb's width of space useful as a rough check. Because feet swell over a day of hiking, test the toe room late in the day or after a walk, not only first thing in the morning.
