
Last Updated: November 4, 2026
Quick Summary
To tape feet for running, clean and dry the skin, wipe the area with isopropyl alcohol, then apply tape with light tension, rounded corners, and no wrinkles, overlapping each strip by half. Tape stays on for one run only and comes off afterward.
- Round the tape corners, since curved edges resist peeling better than sharp ones.
- Anchor the first inch flat with no tension, then apply the rest with light tension.
- Zinc oxide tape gives the most reliable hold on bone-dry, alcohol-wiped skin.
- Never leave foot tape on overnight; remove it after every run.
- A sock that slips inside the shoe can drag tape and cause bunching.
Table of Contents
- How to Tape Feet for Running Step by Step
- Running Tape for Foot Blisters: Which Type to Choose
- How to Tape Toes for Running
- How to Wrap Blisters on Feet for Running
- How Long Should Foot Tape Stay On?
- Troubleshooting Tape That Peels, Bunches, or Fails
- Pairing Tape With the Right Sock for the Terrain
- Shop RockResist Trail Socks and Build Your Foot Care Kit
- Frequently Asked Questions
How to Tape Feet for Running Step by Step
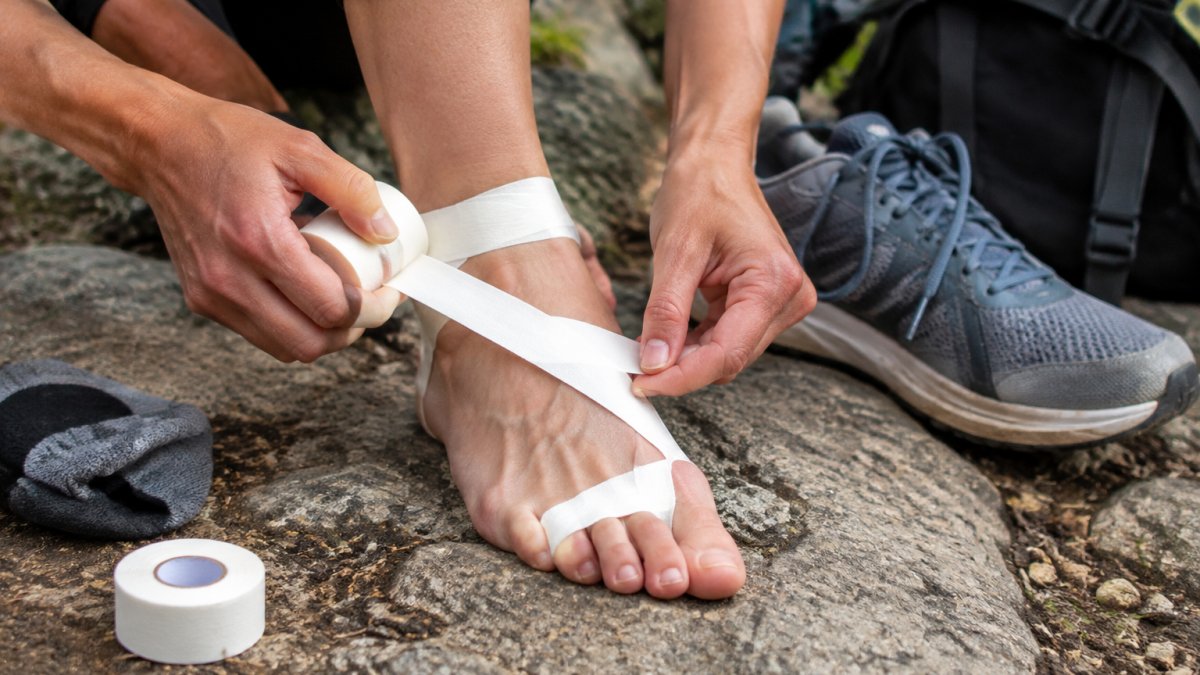
Taping your feet for running is the practice of applying adhesive tape to skin that rubs inside a shoe, so friction lands on the tape instead of your skin.
Most runners tape the wrong way. They wrap a loose loop around a sore spot and hope.
Below, we cover skin prep, tape types, toe taping, blister wrapping, wear time, troubleshooting, and sock pairing.
Prep Your Skin Before the First Strip
Clean, dry skin is the foundation of tape that stays put. Start with these steps:
- Wash and dry the foot completely, including between the toes.
- Wipe the area with isopropyl alcohol on a cotton pad. Let it air-dry.
- Skip lotion, sunscreen, and balms on the taped zone.
- Trim toenails and file rough edges that could snag the tape.
- Check for existing hot spots and treat them before taping over them.
A common mistake is taping over damp skin after a shower. Residual moisture kills adhesion, and the tape lifts within the first mile. Give your feet ten minutes to dry fully.
If you blister easily, pair taping with a proven skin-care routine. Our guide to preventing blisters on long trail runs covers the skin prep steps that work alongside tape.
Apply Tape Without Wrinkles
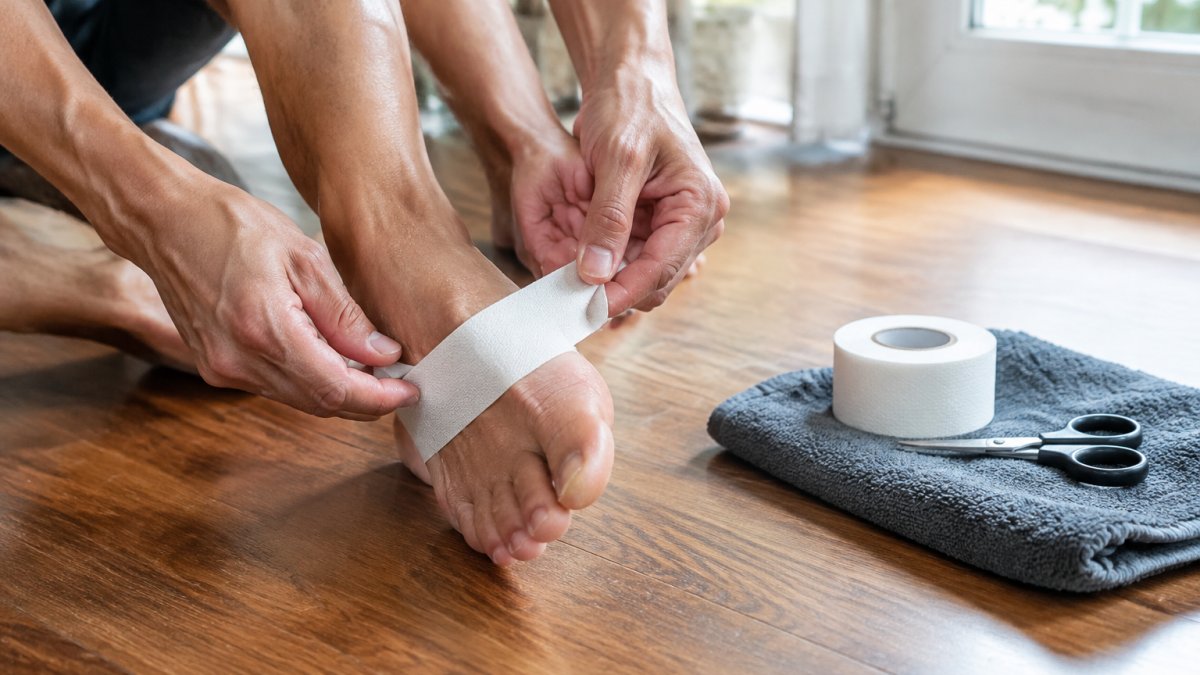
Wrinkle-free application comes down to three habits: anchor, tension, and smooth. Follow this order:
- Cut the strip first. Measure against the area, then cut. Never tear tape against your skin.
- Round the corners. Curved edges resist peeling better than sharp ones.
- Anchor one end. Press the first inch down flat with no tension.
- Apply light tension. Pull gently as you lay the strip, then press it down.
- Smooth from the center out. Use your thumb to push air bubbles toward the edges.
- Overlap by half. Each new strip should cover half the previous one.
- Finish with a rub. Friction from your palm warms the adhesive and sets the bond.
Watch out: tape applied under full stretch will pull on the skin as it relaxes and can tear or lift mid-run. Light tension beats tight tension every time.
Running Tape for Foot Blisters: Which Type to Choose
Running tape for foot blisters is not one product. It is a small family of materials that behave differently on skin, and the right pick depends on what you are asking the tape to do: hold a hot spot, cushion a formed blister, support soft tissue, or survive a sweaty long run. Selecting the appropriate adhesive barrier is the most effective way to prevent running blisters before they compromise your stride and force an early end to your training session.
The four tape categories and what each actually does
- Zinc oxide tape (rigid athletic tape): high-adhesion, low-stretch, and the workhorse for anchoring and covering hot spots that must stay put. It grips best on bone-dry skin and holds up to the shear forces on the ball of the foot and heel. It does not stretch with the foot, so it can feel restrictive over a joint.
- Kinesiology tape: stretchy, softer on skin, and better suited to soft tissue support around the arch or Achilles than to pure friction control. Because it moves with the skin, it is gentler on sensitive areas but less reliable as a hard anchor.
- Padded blister patches and moleskin: cushioned and low-friction, designed to cover a blister that has already formed rather than to prevent one. They absorb pressure and shear but add bulk, which matters inside a snug race shoe.
Match the tape to your skin type
Skin type drives adhesion and irritation more than any other variable. A common pattern among runners:
- Sensitive or reactive skin: patch-test any new tape on the inner forearm the day before a run. Favor hypoallergenic paper tape or kinesiology tape, and avoid stacking rigid tape directly on skin that has reacted before. If redness or itching appears under a strip, remove it rather than toughing out the run.
- Heavily sweating feet: rigid zinc oxide tape on bone-dry, alcohol-wiped skin gives the most reliable hold. Paper tape and loosely applied kinesiology tape tend to lift first in wet conditions.
- Long-distance versus short-distance needs: a short run tolerates a lighter, more breathable tape; a long run or race needs the stronger adhesion of zinc oxide tape and a wrinkle-free application, because every mile multiplies any small lift into a full peel.
A quick selection framework
- Identify the job: friction cover, blister cushion, or soft tissue support.
- Identify the condition: dry and short, wet and long, or sensitive skin.
- Choose the lowest-adhesion tape that still does the job, then test it on one short run before race day.
- Carry a backup strip of a second type in your kit in case the first choice lifts.
The American Academy of Dermatology's guidance on blisters is a sensible reference for skin safety before you tape over an open area.
Watch out: layering a padded patch under rigid tape in a tight toe box can create a pressure point, so check fit with the sock and shoe on before you commit to the combination.
How to Tape Toes for Running
Toe taping protects the spots where toes rub each other or the shoe box. Here is the sequence:
- Clean and dry the toe completely.
- Cut a strip long enough to wrap once around the toe with a small overlap.
- Anchor the start on top of the toe, away from the rub point.
- Wrap with light tension, keeping the tape flat.
- Press the overlap down firmly.
- Check that the tape does not restrict the toe's movement.
For neighboring toes that rub, a thin strip between them works better than a full wrap. Keep the tape narrow so it does not bunch when the toe flexes.
How to Wrap Blisters on Feet for Running
Wrapping a blister is different from taping healthy skin. The goal shifts from friction control to cushioning and protection.
RockResist GEN1 Trail Running Socks, Debris-Blocking Low Cut →
- Clean the area gently and pat it dry. Do not pop the blister.
- Apply a padded patch or a small piece of moleskin over the blister.
- Tape around the patch, not directly over the blister dome.
- Keep the wrap flat and wrinkle-free.
- Check the edges before you put on your sock.
If moleskin irritates your skin or will not stay put, our roundup of moleskin alternatives for blisters covers other cushioning options.
How Long Should Foot Tape Stay On?
Foot tape should stay on for one run, then come off. Most runners get reliable adhesion for a few hours of dry activity, and less in wet or dusty conditions.
- Remove tape after every run.
- Never leave tape on overnight.
- Remove it sooner if it lifts, bunches, or feels tight.
Pulling tape off dry skin in one fast rip can damage the top layer. Peel it back low and slow, holding the skin down with your free hand. Wash and dry the foot afterward, then let the skin breathe.
Troubleshooting Tape That Peels, Bunches, or Fails
Most taping guides stop at application. The more useful skill is diagnosing why tape fails mid-run, because the fix is almost always upstream of the tape itself. When a strip peels, bunches, or tears, work through the causes below in order.
The five failure modes and their mechanisms
| Problem | Likely cause | Mechanism | Fix |
|---|---|---|---|
| Edges lift early | Sharp corners, oily or lotioned skin | A square corner concentrates peel force at one point; oils block the adhesive from bonding | Round every corner, wipe with isopropyl alcohol, skip lotion on the taped zone |
| Tape bunches | Wrinkles at application, overstretch | A wrinkle becomes a ridge that catches on the sock; overstretched tape recoils and folds | Smooth center-out, apply with light tension only |
| Tape slides | Sweat, damp skin, or a sock that slips | Moisture forms a film between adhesive and skin; a moving sock drags the strip | Dry fully, use zinc oxide tape, check sock fit |
| Skin feels tight or stings | Overstretched tape or an adhesive reaction | Tape applied under full stretch pulls as it relaxes; some adhesives irritate reactive skin | Reapply with light tension; switch tape type if stinging persists |
| Tape tears mid-run | Old or degraded roll, wrong tape width | Adhesive and backing degrade with age and heat; a narrow strip concentrates stress | Replace tape each season, match width to the zone |
Diagnose in this order
- Check the skin first. Damp, oily, or lotioned skin is the single most common cause of early lift. If the strip came off cleanly with no residue, suspect prep.
- Check the application. Look for wrinkles, square corners, and signs the tape was stretched hard. These are application errors, not product failures.
- Check the sock. A sock that slips inside the shoe drags tape with it and is often misdiagnosed as bad tape. If your tape keeps bunching, read our guide to stopping socks from slipping inside shoes before you blame the tape.
- Check the shoe. A roomy toe box lets tape move more, so anchor closer to the midfoot. A snug race shoe needs thinner strips to avoid pressure points.
- Check the tape's age. A roll that has lived in a hot car or a gear bag for a season loses adhesion. Replace it.
Match tape to shoe and sock type
Tape does not sit on skin in isolation. It sits between skin and sock, inside a shoe. A thin, smooth sock lets tape move less than a loose, textured one, and a wide toe box changes where you should anchor the strip.
Watch out: re-taping over a lifted strip without cleaning the skin first usually fails again within a mile, because the old adhesive and grit left behind prevent a clean bond.
Pairing Tape With the Right Sock for the Terrain
Tape handles friction at the skin. Your sock handles moisture and debris. You need both working together.
On loose, sandy, or gravelly terrain, debris is the bigger threat.
RockResist GEN1 low-cut socks are built for this pairing.
If you are weighing sock styles for taped feet, our comparison of sweat-wicking vs debris-blocking socks for trail running explains which job each does best.
Shop RockResist Trail Socks and Build Your Foot Care Kit
A complete foot care kit fits in a small pouch: tape, scissors, alcohol wipes, padded patches, and a spare pair of socks. Build it once, restock it after every race, and you will never tape in a hurry again.
Shop RockResist Trail Socks to check current sizing and offers, and see how the debris-blocking barrier pairs with your tape routine.

Frequently Asked Questions
How do I tape up my feet for running without wrinkles?
Start with clean, dry skin and press the tape down from the center outward, smoothing as you go. Keep tension light so the tape conforms to the foot instead of pulling tight. Cut strips long enough to wrap past the hotspot with a small overlap, and round the corners so they do not catch on the sock. Wrinkles create pressure points and lift edges, which is why a slow, smooth application matters more than speed.
Should you tape your feet before or after a blister forms?
Tape works best as prevention, applied before a hot spot turns into a blister. If a blister has already formed, do not tape directly over a broken or draining blister. Clean and cover it with a non-stick dressing first, then tape around the area to reduce friction. For an intact blister, a thin layer of tape or a blister patch can reduce rubbing, but check it after the run and remove the tape gently.
Can you use kinesiology tape to prevent foot blisters?
Kinesiology tape is stretchy and designed for soft tissue support, so it is not the best choice for friction control on the foot. Zinc oxide tape and rigid athletic tape hold better against sweat and shear forces at hotspots like the heel and ball of the foot. If you use kinesiology tape for arch or Achilles support, keep it separate from the blister-prone areas and check that edges stay flat inside the shoe.
How do you keep foot tape from peeling off while running?
Peeling usually starts with moisture or a bad anchor. Dry the skin fully, avoid lotions before taping, and anchor the tape on a flat, hairless area with a small overlap. Round the corners and press the edges down firmly. A sock that stays in place helps, and a low-cut sock with a debris-blocking barrier at the collar can help keep grit out at the shoe collar. If tape still lifts on long runs, try a thinner strip with more overlap rather than a wider piece.
Your next long run will test your prep, not your willpower. Tape with clean skin, light tension, and a sock that keeps grit and moisture away from the adhesive. RockResist GEN1 socks bring a debris-blocking collar barrier, a secure non-slip fit, and two wear options for loose terrain or a lower profile. Get started with RockResist and give your tape a base it can hold onto.
