
Last Updated: November 9, 2026
Quick Summary
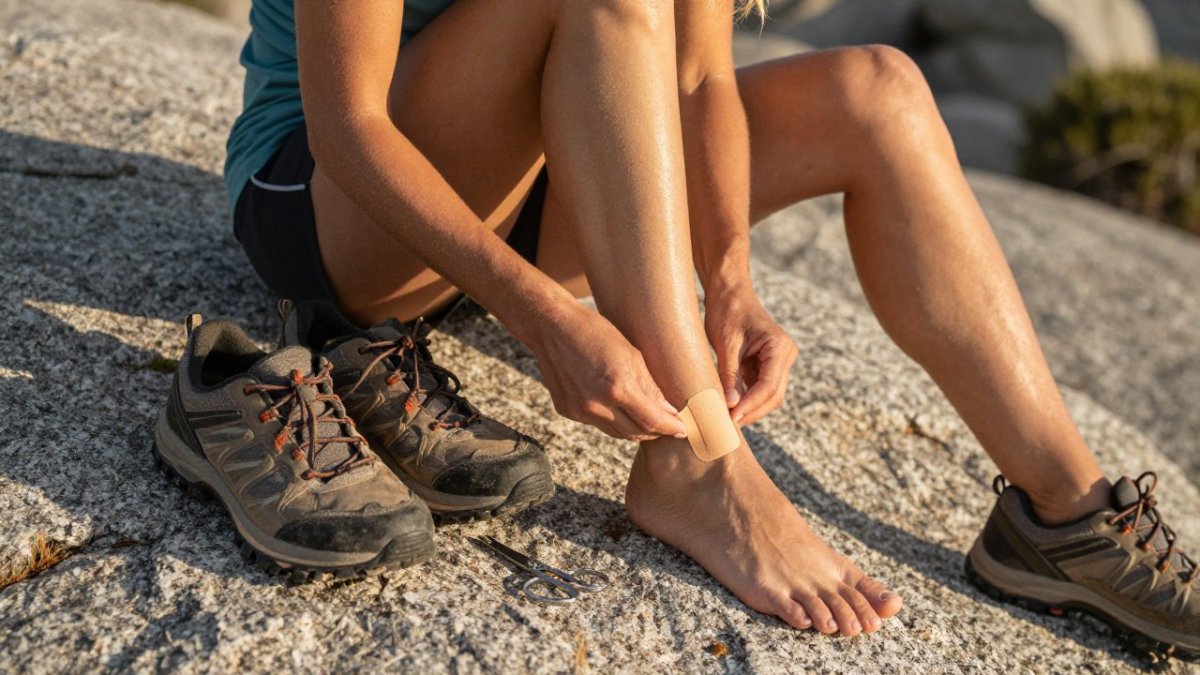
To learn how to use moleskin for trail running blisters, first check whether the skin is intact or a blister has formed. Apply a solid moleskin patch directly over a hot spot, but cut a doughnut hole so the pad surrounds a formed blister and keeps pressure off the fluid pocket.
- Stop at the first hot-spot signal, since a mile-three fix beats a twenty-minute stop later.
- Dry the skin and let it air for 60 to 90 seconds before applying moleskin.
- Cut the doughnut hole before peeling the backing, and round every outer corner.
- Press the patch from the inner edge outward and hold for 30 seconds.
- For heels, wrap the moleskin slightly around both sides and use heel-lock lacing.
Table of Contents
- How to Use Moleskin on Blisters: A Trail-Side Decision Tree
- Step-by-Step: Applying Moleskin on the Trail
- How to Use Moleskin on Heels Without It Rolling
- How to Use Moleskin on Toes for Toe-Box Friction
- Best Moleskin for Blisters: What to Pack and Why
- Layering, Adhesion, and Field Troubleshooting
- When Moleskin Is Not the Right Choice
- Build Your Trail-Blister Kit with RockResist
- Frequently Asked Questions
How to Use Moleskin on Blisters: A Trail-Side Decision Tree
Learning how to use moleskin for trail running blisters comes down to one question: is the skin still intact, or has a blister already formed?
The catch is that most guides treat moleskin like a bandage. It is not.
Below are practical steps for applying moleskin on the trail, from hot spot to heel to toe box.
American Podiatric Medical Association guidance on blisters
Hot Spot vs. Formed Blister: Which Path to Take
A hot spot is early friction damage: warm, red, tender skin with no fluid pocket. A formed blister has a raised pocket of fluid under the skin.
- Hot spot: clean and dry the area, then apply moleskin directly over the spot to stop the rub.
- Formed blister: cut a doughnut hole in the moleskin so the pad surrounds the blister and takes pressure off it.
- Broken blister: cover it with a sterile dressing first, then build the moleskin ring around it. Do not tape adhesive straight onto open skin.
A common mistake is slapping a solid patch over a full blister.
If you are unsure which path you are on, treat it as a formed blister. For the full three-step prevention framework, see Prevent Blisters on Long Trail Runs.
Mayo Clinic overview of blister causes and care
Step-by-Step: Applying Moleskin on the Trail
Moleskin application on a trail differs from application at home. The sequence below is written for those conditions.
Stop Early, Not at the Summit
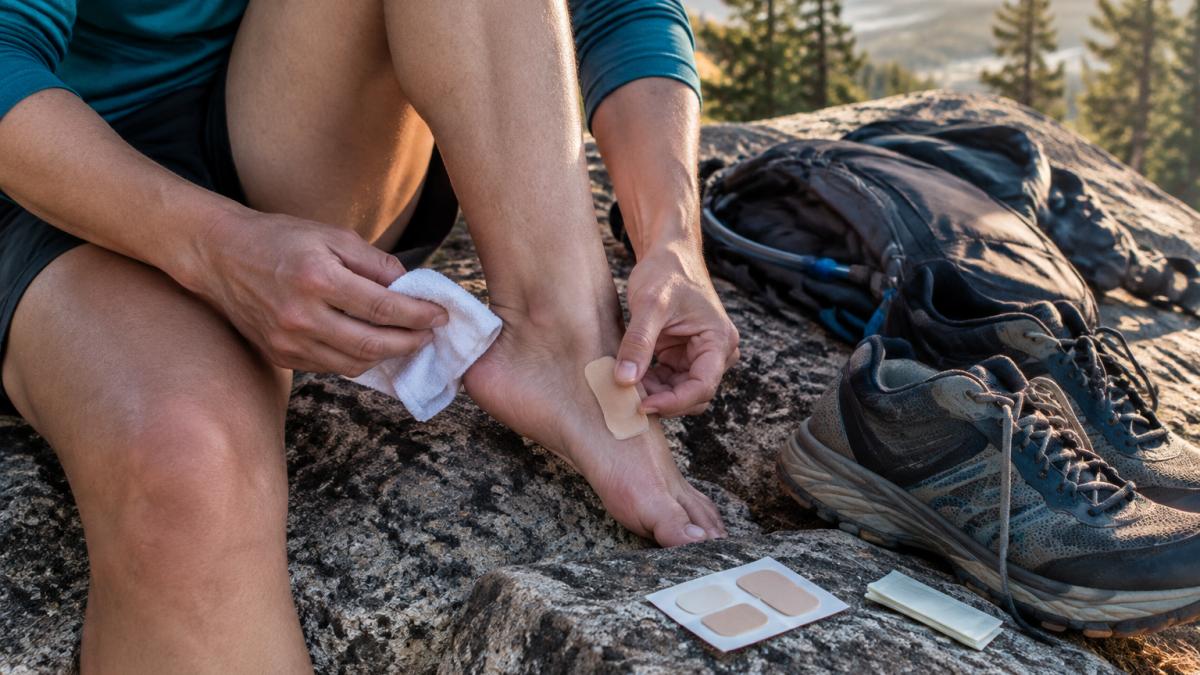
The single biggest field variable is timing. A hot spot you feel at mile three is a two-minute fix; the same spot at mile fifteen is a twenty-minute stop and possibly a DNF.
Pick a spot out of the wind if you can. Dust and grit are the enemy of adhesion, so avoid applying on an exposed ridge or in loose sand if a sheltered rock or tree is nearby.
Dry the Skin Without a Sink
Adhesive will not bond to damp or dirty skin, and trail feet are almost always both. The field method:
- Take off the shoe and sock and set the sock somewhere clean, inside the pack, not on the dirt.
- Wipe the area with a small dry cloth or clean bandana, starting at the center of the hot spot and working outward so you are not dragging grit back across the skin.
- If the foot is heavily sweaty, blot first, then let the skin air for 60 to 90 seconds. A dry cloth plus air beats a wet wipe, which leaves residue.
Watch out: applying moleskin over a wet or lubricated hot spot can cause a field patch to fail quickly. If you cannot get the skin dry, wait for a drier stretch of trail rather than wasting a patch.
Cut the Doughnut Hole Before You Peel
Cut the moleskin before removing the backing. Once the adhesive is exposed, it will stick to itself, your fingers, and any grit on the wind.
- Cut a piece larger than the sore spot, roughly a half-inch of margin on every side is a common starting point, adjusted to the size of the area.
- Fold the piece and snip a hole in the center, then open it into a ring. The hole should sit around the blister or hot spot, not on top of it.
- Round every outer corner. Square corners catch on socks and lift first.
Press, Warm, and Set
Peel the backing and press the ring down firmly, starting at the inner edge and working outward so you push air out rather than trapping it. Hold for 30 seconds.
Pull your sock on slowly and check that the edge is not folded. Lace up and take a short test walk before you load the pack and resume.
American Podiatric Medical Association guidance on blisters
What Changes When the Trail Is Wet or Muddy
Wet conditions change the order of operations more than the patch itself:
- Dry the skin longer. A sweaty foot in humid conditions may need two minutes of air, not one.
- Keep the spare patch in a zip-top bag inside the pack. Moleskin that has absorbed ambient moisture loses grip.
- If the foot is muddy, rinse or wipe the area with clean water first, then dry thoroughly. Mud left under the patch is a guaranteed lift.
What Changes on Long Descents and Uneven Terrain
Downhill running can drive the foot forward in the shoe, which may cause heel and toe patches to lift on descents. Two field adjustments help:
- Apply the patch before the descent, not during it. Stopping mid-descent on loose terrain is a safety risk.
- Re-lace before the descent with a heel-lock pattern so the foot does not slide forward into the patch edge.
If you are unsure whether you are dealing with a hot spot or a formed blister, treat it as a formed blister and use the doughnut ring. The ring works on a hot spot too, and it is the safer default when you cannot see the skin clearly in low light or bad weather.
How to Use Moleskin on Heels Without It Rolling
Heel patches peel because the heel moves up and down inside the shoe with every step. The fix is coverage and a locked-in fit.
Cut a piece that wraps slightly around both sides of the heel, not just the back. Round the corners so nothing catches on the sock.
A loose heel rubs. A locked heel stays put, and so does the patch.
How to Use Moleskin on Toes for Toe-Box Friction
Toe blisters usually trace back to a shoe that is too short or too tight. Moleskin buys you comfort, but fit is the real fix.
Wrap a small strip over the top or side of the toe where it rubs. Keep it thin, because bulky patches crowd the toe box and create new pressure points.
For sizing guidance, see our guide to choosing the right trail running shoe size.
Best Moleskin for Blisters: What to Pack and Why
Moleskin for blisters should be thick enough to cushion and should stay stuck when damp; it is commonly sold in rolls or precut pads you can trim with small scissors.
What we would carry:
- A roll of moleskin plus two precut doughnut pads
- A small pair of scissors
- A tiny towel for drying skin
Watch out: moleskin that has been in a pack for seasons loses its grip. Replace it each season.
| Situation | Fix | Why It Works |
|---|---|---|
| Hot spot, skin intact | Solid moleskin patch | Blocks friction at the rub point |
| Formed blister | Doughnut-hole ring | Takes pressure off the fluid pocket |
| Broken blister | Dressing plus moleskin ring | Keeps adhesive off open skin |
| Heel patch rolling | Heel-lock lacing | Stops the up-and-down slide |
Layering, Adhesion, and Field Troubleshooting
When a patch lifts, the cause is almost always one of three things: moisture under the adhesive, grit at the edge, or a bad edge shape. Fix those three and the patch holds. The harder question is what to layer and in what order, because moleskin is rarely used alone on a trail.
The Layering Order That Works
The general rule is: skin first, then the dressing that touches damaged skin, then moleskin as the friction barrier, then the sock.
- Intact skin, hot spot: moleskin directly on dry skin. No dressing needed.
- Formed blister, roof intact: doughnut ring of moleskin around the blister, skin visible inside the hole. Some runners add a thin non-stick dressing inside the hole so the blister roof does not rub on the sock; that is a judgment call based on how much room the shoe allows.
- Broken or weeping blister: sterile dressing on the wound first, then the moleskin ring around it. Adhesive must not touch open skin.
Watch out: layering a hydrocolloid bandage under moleskin can add enough bulk to change shoe fit in the toe box. If the shoe was already snug, use a thinner dressing or fix the fit instead.
Why Edges Lift, and the Fix for Each Cause
Edge lift is mechanical. The sock catches the edge, the shoe pushes the foot against it, and the adhesive peels from the outside in. Match the fix to the cause:
- Rounded corners still lifting: the patch is too small for the movement. Add margin, especially on the heel and the ball of the foot.
- Lifting after sweat: moisture has reached the adhesive. Dry the skin longer next time and keep spare moleskin sealed.
- Lifting after grit: a grain of sand under the edge acts like a wedge. Wipe the skin and the surrounding shoe interior before applying.
Field Repair When a Patch Fails Mid-Run
If a patch lifts mid-run, do not press it back down over grit. Stop, remove the patch, wipe and dry the skin, and apply a fresh piece.
If the skin under the patch is now broken, switch to the broken-blister protocol: sterile dressing first, then a ring of whatever barrier you have, and keep adhesive off the wound.
When to Stop Layering and Change the Setup
There is a point where more moleskin makes things worse. If you have re-applied twice in the same spot and it keeps lifting, the problem is the shoe-sock interface, not the patch. Common fixes at that point:
- Tighten or re-lace the shoe to reduce foot movement.
- Swap to a dry sock if the current one is soaked.
- Add a thin liner sock if the outer sock is bunching.
For a full taping method when moleskin will not hold, follow our step-by-step guide to taping feet for running.
When Moleskin Is Not the Right Choice
Moleskin is not the right choice for open, weeping blisters, for skin that is already irritated by adhesive, or when you need a lower-profile patch under a tight shoe.
Some runners also find that moleskin adds too much bulk in the toe box. If that is you, switch to a thin tape and fix the shoe fit instead.
To compare options before you pack, read our breakdown of moleskin alternatives for blisters.
Build Your Trail-Blister Kit with RockResist
Moleskin handles the rub. A sock with a debris-blocking barrier can help with the grit that gets in at the shoe collar.
RockResist GEN1 low-cut socks use an integrated barrier at the shoe collar to help block dirt, sand, and small trail debris.
Pairing a patch with a sock that stays in place may help with two common sources of trail foot irritation. For sizing, check the manufacturer's size guide against your own measurements.
View RockResist Socks & Sizing to add a pair to your kit.

Your feet take a beating on technical ground, and a patch only covers one spot.
Frequently Asked Questions
Do you put moleskin directly over a blister?
Only over an intact blister, and never directly on broken skin. For an intact blister, cut a doughnut-shaped piece of moleskin so the hole sits over the blister and the ring takes the pressure and friction. If the blister has opened, clean the area, apply a sterile dressing or bandage first, then place moleskin around it. Putting adhesive straight onto an open blister can trap dirt and irritate the skin. Stop and seek medical advice if you see spreading redness, warmth, or pus.
How do you keep moleskin in place during a trail run?
Start with clean, dry skin, because moisture is the main reason moleskin lifts. Rub the moleskin firmly for 30 to 60 seconds after applying so body heat activates the adhesive, and round the corners so they do not catch on socks. Choose a size that covers the hot spot with a small margin rather than a large sheet that wrinkles. Pair it with a sock that stays put and a shoe that is laced securely. If edges still peel, add a thin strip of tape over the border.
What is better than moleskin for blisters?
It depends on the stage. For a hot spot, moleskin or a low-friction patch works well to reduce rubbing. For an intact blister, a hydrocolloid blister dressing can cushion and protect while it stays in place. For an open blister, a sterile dressing plus a protective pad is the safer choice. Many trail runners carry moleskin for prevention and a hydrocolloid dressing for treatment. Test any combination on a short run before race day so you know how it behaves under sweat and distance.
Can you run with a blister on your foot?
Many runners can continue if the blister is small, intact, and protected with a dressing that removes pressure and friction. Clean and dry the area, cover it, and check it at aid stations or after the run. Do not run through a blister that is increasingly painful, has opened, or shows signs of infection such as spreading redness or pus. For trail running, also address the cause: debris in the shoe, a loose heel, or a toe-box that rubs. A debris-blocking sock and a secure lacing pattern can reduce repeat friction.
